

Results 81 to 100 of 101
-
05-09-2009 #81

 Registered User
- Join Date
- Oct 2008
- Location
- Roseville
- Posts
- 286
I need to sell my boat asap! I want this setup!
-
05-11-2009 #82 Registered User
- Join Date
- Nov 2005
- Location
- Auburn, WA
- Posts
- 1,360
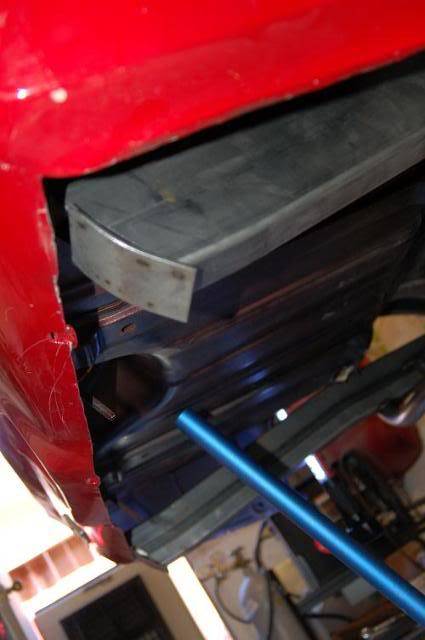
That's front subframe clearance. Originally Posted by Rhino

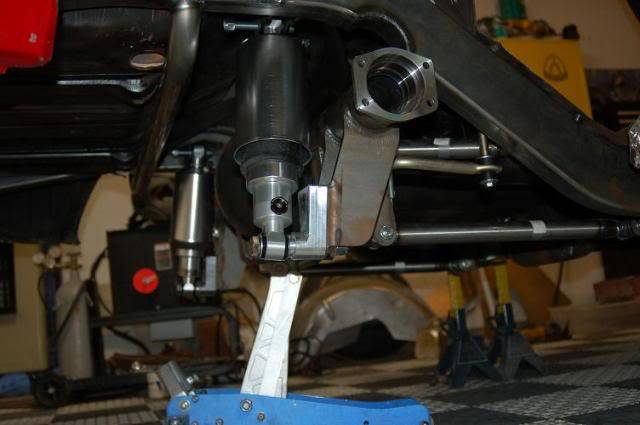
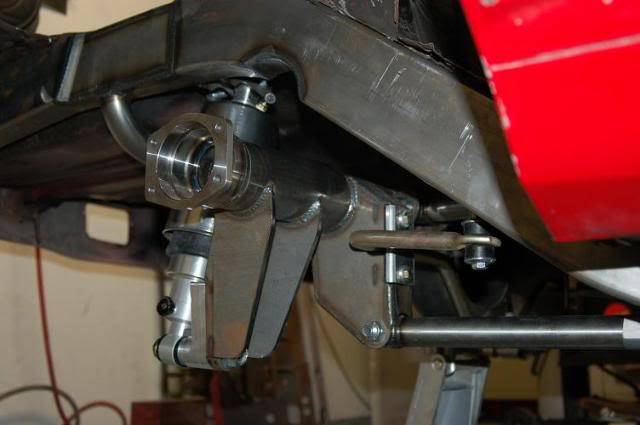
Our triangulated 4-bar does not work well with 12-bolts, due to the width of the cast center. If we moved the UCAs outward, the links would shorten too much and cause nasty roll steer and pinion angle changes. Also, we try to keep the angle of the links (in a plan view) as they are for lateral stability.Matt Jones
Mechanical Engineer
Art Morrison Enterprises
05-11-2009 #83
Registered User
- Join Date
- Nov 2005
- Location
- Auburn, WA
- Posts
- 1,360
You can view some photos some photos here: Originally Posted by urbanhomeskillet
http://www.artmorrison.com/gallery/v...ontClip&page=1
We don't have any of the tri-4 bar taken yet, but the 3-link is pretty similar. The only difference is the 4-bar requires no UCA hoop, and therefore no floor cutting.Matt Jones
Mechanical Engineer
Art Morrison Enterprises
06-08-2009 #84
Registered User
- Join Date
- Oct 2008
- Location
- Roseville
- Posts
- 286
Mine should be shipping next week, cant wait to install it. Any tipe on the install?
06-08-2009 #85 Registered User
- Join Date
- Apr 2001
- Location
- Miami, Florida
- Posts
- 1,639
Looks like my exhaust...
Looks cool and sounds mean but creates HUGE clouds of dust and anything else that happens to be laying on the ground under you. I pointed my exhaust down too and can't keep my car clean for one second!
I love the suspension set-ups.
Originally Posted by silver69camaro
Kevin.
69 Firebird "Eternity"
06-09-2009 #86
Registered User
- Join Date
- Nov 2005
- Location
- Auburn, WA
- Posts
- 1,360
Really? I haven't had that problem (much). It gets dirty, but I just use some Griots undercar cleaner and it comes right off. Originally Posted by Jagarang
Having the X-pipe just before the turndowns sounds very good...Matt Jones
Mechanical Engineer
Art Morrison Enterprises
06-09-2009 #87
Registered User
- Join Date
- Nov 2005
- Location
- Auburn, WA
- Posts
- 1,360
It's really pretty easy. First, place the rear caps into the frame rails. With the stock frame rails removed, insert rear of subframe into the bumper/rear valence area. Then, use a floor jack to raise the front crossmember into place. With a tape, make sure it's squared up pretty well, then get another floor jack to press the rear of the frame rails tight against the trunk floor, and do the same with the front jack. The idea is to get some of the cars weight onto the subframe to ensure a tight fit. When you're happy with the placement, place a few stitchwelds between the trunk floor framerails, rear valence, and front crossmember. Done! Originally Posted by camaro2nv
Matt Jones
Mechanical Engineer
Art Morrison Enterprises
06-09-2009 #88 Registered User
- Join Date
- Apr 2005
- Location
- Fife, WA
- Posts
- 887
Originally Posted by camaro2nv
Thanks for your order! TAKE LOTS OF PICS would like to post them up on our site.
07-09-2009 #89
Registered User
- Join Date
- Oct 2008
- Location
- Roseville
- Posts
- 286
Thanks guys. Got all but my axles and gearing today. Im guessing that side is coming from Frank. Everything was boxed up and on the pallet nice and neat! One thing though, is there any instructions? I cant wait to get this baby installed! Take one more part off the list!!!
07-13-2009 #90
Registered User
- Join Date
- Oct 2008
- Location
- Roseville
- Posts
- 286
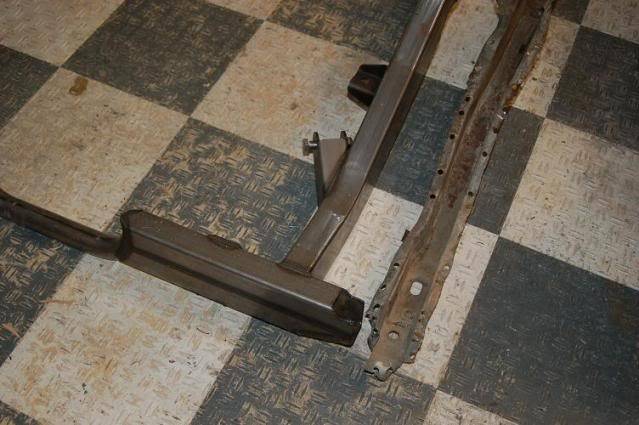
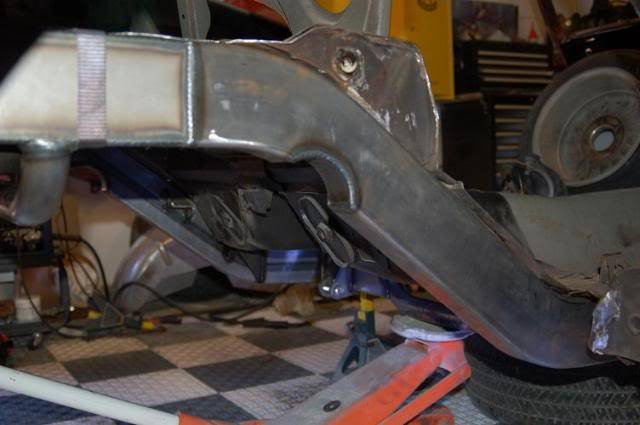
Heres a shot for those of you on the fence. Its the stock frame rails compared to the Morrison piece.
07-14-2009 #91
Registered User
- Join Date
- Nov 2005
- Location
- Auburn, WA
- Posts
- 1,360
I have instructions I can email you if you didn't get them. PM me your email address and I'll get it to you. Originally Posted by camaro2nv
Matt Jones
Mechanical Engineer
Art Morrison Enterprises
07-15-2009 #92 Registered User
- Join Date
- Jul 2006
- Location
- Phoenix
- Posts
- 467
Matt, there are many canted 4-bar systems out there on 12 bolts and I haven't read any negative feedback on them. Would you elaborate on your statement about the UCA's being too far apart and just what you mean by "nasty roll steer"? Which has more impact on roll steer, UCA separation or side view angle of the UCA's? Originally Posted by silver69camaro
Would your Tri 4 Bar suspension package work on a 1st gen 12 bolt? I love your companies products but I'm too for along for this new kit your talking about in this thread. Thanks!
07-15-2009 #93
Registered User
- Join Date
- Nov 2005
- Location
- Auburn, WA
- Posts
- 1,360
All of the things you mentioned will have an affect, but it all depends on how much of a change you make. Originally Posted by ErikLS2
If the UCAs are widened laterally, they link must get shorter to match up with the bracket on the rail. Too short of a link will cause the housing to steer radically in a roll...how short is that? Honestly I don't know, it isn't something I've tried. We do have customers who have used our tri 4-bar kit on 12-bolts, and typically they'll lessen the UCA plan view angle, which is OK to a certain degree. We try to tell customers to keep the UCAs at 30* or more (plan view again, relative to the frame rail) for lateral stability. There indeed are many triangulated kits on 12-bolts, but we'll only offer ours in a way we know works the best possible.
The only way I can see our clip working with a 12-bolt is if we left the UCA frame brackets tacked on, and the housing brackets loose. I'm quite sure you'd have to modify both frame and housing brackets in order for it to work. For as much as you can sell a 12-bolt for a first gen Camaro, I'd go ahead and do a 9"...Matt Jones
Mechanical Engineer
Art Morrison Enterprises
07-15-2009 #94 Registered User
- Join Date
- Apr 2009
- Location
- Asheboro NC
- Posts
- 194

those frame rails look strong as hell, theyll pay off in the long run!
07-15-2009 #95
Registered User
- Join Date
- Aug 2004
- Location
- Milwaukee, Wi.
- Posts
- 327
This setup looks fantastic!
Will this work in a high hp drag/street application?
I know this is not made for drag, but fox Mustangs, g body's etc. use similar setups.
Steve
07-16-2009 #96
Registered User
- Join Date
- Nov 2005
- Location
- Auburn, WA
- Posts
- 1,360
It could be made to work, yes. Like you said, wouldn't be as ideal as our true 4-link, but should work well with a nice tire. Originally Posted by blown69nova
Matt Jones
Mechanical Engineer
Art Morrison Enterprises
07-19-2009 #97
Registered User
- Join Date
- Oct 2008
- Location
- Roseville
- Posts
- 286
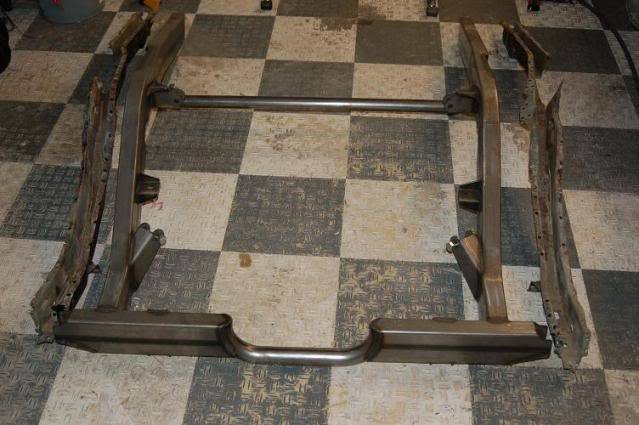
Sunday afternoon, time to put some work in. Boy this Morrison rear clip fits like a glove. It fit so tight I dont know how measurements could be off. I still have to weld it in but I got it in place for now.
Raise the rear first to get it in place.
Little bit from the front and rear jacks now

Added a ratchet strap to help with the one man show,lol
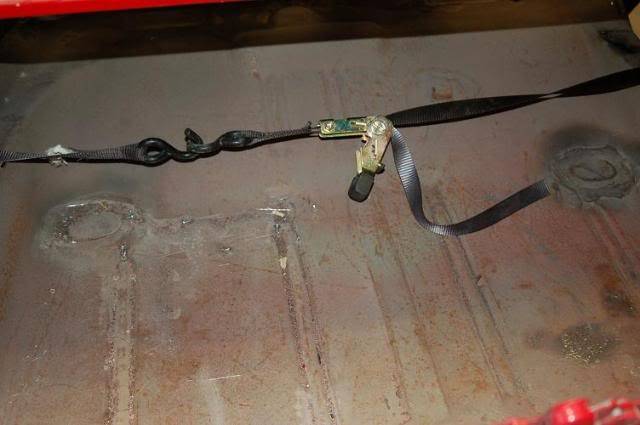
3.2.1....
CONTACT!

These are the only two holes you need to drill on each side. That way you can get to the nut
Thats it for now. Later on when it cools off in the garage Ill tack it in pace and put the rear axle in place. 105 outside is just too hot, I bet the garage is 120.
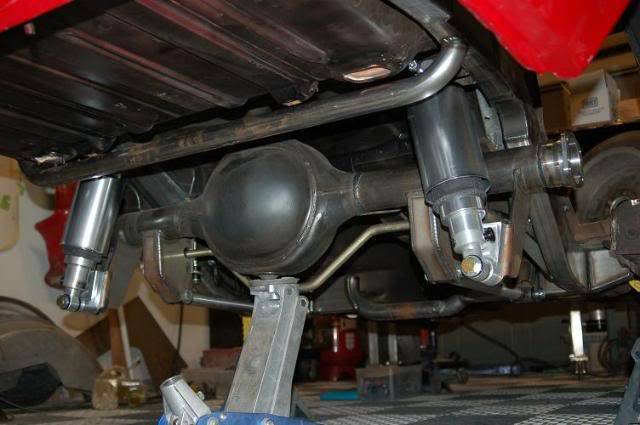
07-19-2009 #98
Registered User
- Join Date
- Oct 2008
- Location
- Roseville
- Posts
- 286
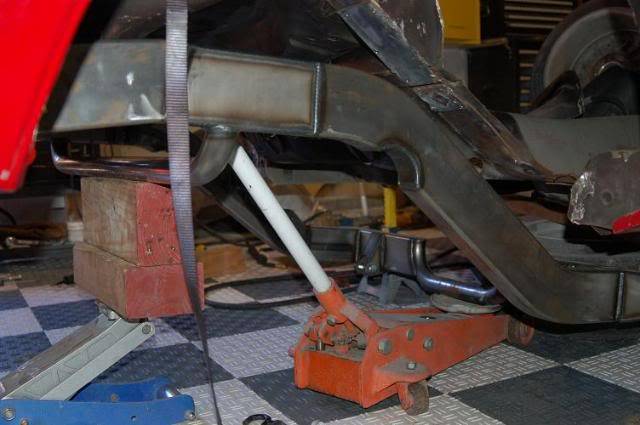
Ok so got the rear end mounted. Man she looks good! Cant wait to get the tru track in!

07-21-2009 #99
Registered User
- Join Date
- Jul 2007
- Posts
- 18
Nice pics, looks like it's going in well. I've had mine for about a year now and have only had time get the front sub in =(
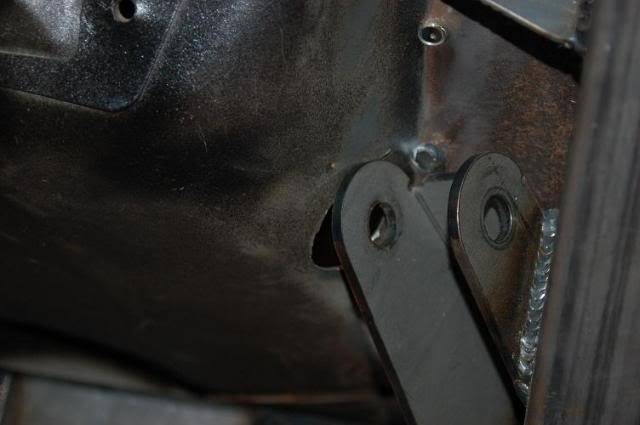
I see you've tacked plates on the rear of the rails, is that just to keep debris out or did you have another reason?
Also, thanks Matt for the earlier overview of the install it made it sound very easy and straightforward.
07-23-2009 #100
Registered User
- Join Date
- Oct 2008
- Location
- Roseville
- Posts
- 286
The plates come with the kit. The instructions say to weld them on to the end and then to weld them to the rear pan. Originally Posted by Corinthian

 Reply With Quote


